eSIM Cards
Which Motorola phones are eSIM compatible?
Motorola has a great range of eSIM-compatible phones, providing a more convenient and flexible alternative to traditional SIM cards. Models in the Razr, Edge, and G series are among the…
Advertising Disclosure
Roami was founded to serve as a trusted resource for travelers in need of reliable internet solutions abroad. Our team, comprising avid travelers, provides comprehensive reviews and guidance on data SIM cards, eSIMs, pocket WiFi devices, and free WiFi apps, drawing from firsthand usage during our travels.
We are committed to offering unbiased and thorough recommendations. To support our website, we earn affiliate commissions from links to products on our site. While our reviews are independent and based on our own experiences and detailed product testing, these commissions allow us to cover costs and continue bringing valuable advice to travelers worldwide.
Our reviews and articles are updated regularly to ensure relevance and accuracy. Please note that we may not review every product in the market, but we strive to cover as many as possible to maintain a wide-ranging resource for our readers. Join us at Roami to stay connected wherever your travels may take you.

Yesim is a brand of Genesis group AG, which is located in Switzerland and provides cellular data connectivity through eSIM (embedded SIM). You can find it on the brand’s official website in two languages: English and Russia, available on the internet to a wide group of countries in the world. And so that’s why we bring to you – Yesim APP – the app where travelers, tourists, explorers and business agents are able to manage everything related to the purchase of Yesim eSIM products, cellular data, and their respective installation and use. Today we will tell you about the features of their products, the target audience, how to obtain and install them, and everything related to Yesim eSIM.
We will try to provide clarity on the use of the app and how the traveller can manage data plans that best suit him from his personal account, we will indicate operational and technical characteristics of both eSIM and the tools needed to use eSIM, we will show you which devices are compatible with Yesim’s eSIM.
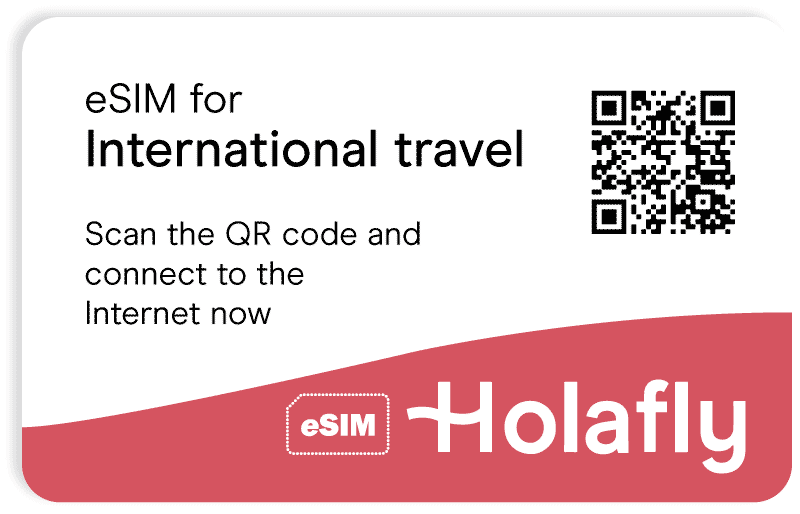
Table of Contents
eSIM’s function is to link its users to cellular internet and is associated with the mobile app Yesim app. This app and the eSIM are the brand’s main products. On the app, there are options such as buying and installing eSIM Yesim cellular data. This company offers services similar to Truphone, Gigsky, Airalo or Soracom.
I have used Yesim during my travels in South Africa and Europe (early 2020). The service works well with new iPhones and is very cheap compared to other eSim providers (I paid €6 per GB for 30 days). I recommend trying it to save drastically on home plans when traveling (often $10/day with AT&T and Verizon.
Sjonk
Just make sure you have the right configuration: make Yesim your mobile data line and don’t allow switching mobile data to your main provider to save costs.
Cosgood
I was worried that this app was a scam, as it is much cheaper than competing apps and they have no web presence at all. However, I am happy to report that it is doing very well in Thailand this week.
Artycheng_Peter
Easy to use and does what it’s under for! Not many ads, if any. Thank you. This is the only app that works for me.
Yesim User
The eSIM from roaming telecommunications company Yesim is an electronic SIM card that is integrated into the device (smartphone, tablet, ipad, pc, etc.) This service gives you the convenience of having two cellular connectivity providers on one device at the same time. You can have separate providers for personal and business purposes or add an additional line when traveling abroad.
YESIM’s eSIM only works on unlocked devices compatible with the technology, we will show you in this article what they are and how to install an eSIM depending on the operating system: IOS or Android.
Learn about Yesim’s eSIM and cellular data operational features.
| eSIM Yesim operative feature | FAQ | Answer |
| Accessibility | Where and how can I buy it, is it expensive? | From the website Mobile application: Yesim: eSIM Travel Mobile Data App |
| Top Up | Can I top up my credit at my destination? | From the web or in the app Add plans if you have an active plan. |
| Guide installation | How do I install it on my device? | Follow the instructions in this article and the support section of the website. |
| Flexibility | How many eSIMs can I have installed at the same time? | You can install up to 12 eSIMs in your account but only one active at a time. Installed eSIM and physical card. |
| Compatibility | How do I know if it is compatible with my cellphone device? | The app shows you when you download it. Check the listing in this article. |
| Hotspot | Can I share my data with others? | Yes, by configuring the device settings |
Time needed: 15 minutes
First, we recommend creating an account
To use the Yesim service, you need to create an account from the app (Yesim: eSIM Travel Mobile Data App) or from the web (in English or Russian), then choose a data plan depending on your geographic requirements and amount of data and install the eSIM profile, these are the essential steps:
If you do not yet have an account, please follow the steps below.
You can search for eSIM Travel Mobile Data App from the Google Play store or App store to download it.
Once you have downloaded the mobile application you must register or log in.
You can do this via Google Gmail or Facebook.
Check your email address and a confirmation email will be sent to the address you have specified. Please check your inbox to confirm your account.
When you purchase the eSIM, it is automatically installed on your device.
You will get the message “Add a new mobile plan? Click add to start the process.
When the eSIM is installed, your device will prompt you to reboot. Please restart the device and enter its settings page when you are done.
Settings – Connections – SIM card manager.
Name the eSIM as “Yesim” – it will be easier for you to handle it later.
Select it as your preferred SIM card to work with your cellular data.
Settings – Connections – Mobile networks, data roaming – On
Recommendations before buying.
Once you have created your account or logged in to the App, you can choose a suitable data plan according to the country in which you plan to use the internet and make the payment.
1. To get started, tap Buy Plan. Simply type the name of the country you are planning to visit in the app’s search engine, the app will list all mobile service plans that include this country.
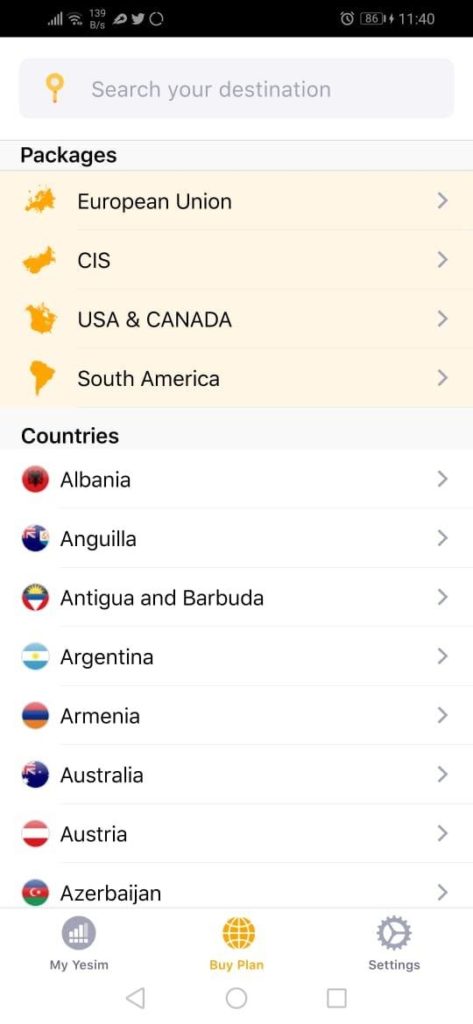
You can then choose the duration and the number of MBs/GBs.
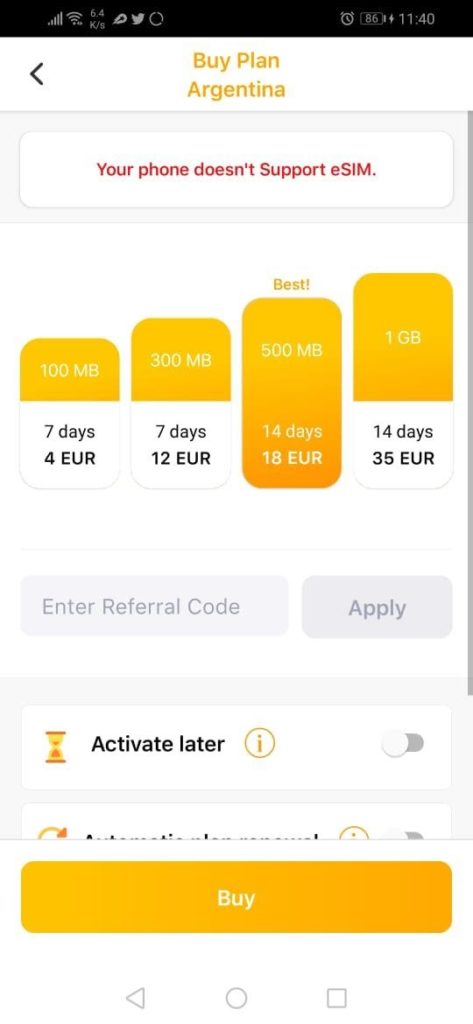
2. If another user has advised you to use this App, ask them for the referral code. You will both receive a €3 bonus to your account balance. Then click on Buy with the card.
3. Check that everything is correct and click on pay securely. Then enter your card details and click Pay. After a successful payment, you will receive a receipt on your email. If you have not received it within 2-5 minutes, please check your spam or junk mail folders.
4. You will also receive an email with detailed information on how to add the Yesim profile to your eSIM-capable device.
5. Finally, install the eSIM profile on your device.
There are several options for adding a Yesim profile to your device, here are the most important ones.
When you purchase the eSIM, it is automatically installed on your device.
You will see this message “Add a new mobile plan? Click add to start the process.
Settings – Connections – SIM Card Manager.
Settings – Connections – Mobile networks, data roaming – Enabled
If the data connection is not established, select Access point names – Yesim – Add – add a new access point: name it “Yesim”, APN “fast-access”, save it and select it in the list – then check the connection.
As you have purchased the Yesim code, you have a new tab available in the app called “Yesim Installation”. Here you can find the code and some options on how this code can be shared within your nearest devices. You can also find the code being sent to your email address.
Go to your device’s Settings – Connections – SIM card manager – Add mobile plan – Add using QR code.
You can also open the camera and scan the QR code:
Note: internet connection is required when adding the code.
Settings – Connections – Mobile networks
Data roaming – On.
If the data connection is not established, select Access Point Names – Yesim – Add – add a new access point: name it “Yesim”, APN “fast access”, save it and select it from the list – check the connection!
Note: For security reasons, after the Yesim QR code is installed on your device, it cannot be used on any other device.
In case there is a problem scanning the QR code or you have no other devices, this is the option that allows you to install your eSIM profile.
Follow the instructions:
Go to your device’s Settings – click on Connections – then click on SIM Card Manager – Add mobile plan – Add using the activation code.
The activation code must be of the type LPA:1$smdp.io$4Y-L6KA7-1754C90
If the data connection is not established, select Access point names – Yesim – Add – add a new access point: name it “Yesim”, APN “fast access”, save it and select it in the list and check if it is connected.
Device compatibility varies from country to country. For example, iPhones XS, XS Max and XR sold in China, Macau and Hong Kong are not eSIM compatible – however, they are Dual SIM phones with 2 physical SIM slots.
Your device must be unlocked. You can check with your operator to see if there is anything you can do to unlock the eSIM on your device. Below is the list of Yesim compatible phones as of November 2020 update.
IOS
Note: Your device must be unlocked and the iOS version must be updated to 14.1 or later.
Android
Note: Note: If you have a device manufactured in Turkey and it prevents you from installing the eSIM, please have your device restored to factory settings.
Yesim belongs to the Genesis group which provides a range of infrastructure, software and platform services to the blockchain industry, and is a data center operator and provider of colocation and hosting services to corporate and private customers for a range of applications including video rendering, AI, and blockchain development applications.

Marco Andreas Streng: is a German entrepreneur, CEO, and co-founder of Genesis Group, a cryptocurrency company based in Iceland. He studied mathematics at Ludwig Maximilian University in Munich but dropped out before graduating thanks to an interest in cryptocurrencies and blockchain technology developed while at university.
Yesim is headquartered in Geneva, Switzerland.
These are the social networks where you can find Yesim:
Check how much data you are using now:
On your iPhone, go to Settings – Mobile Data. If you’re using an iPad, you might see Settings – Mobile Data.
Scroll down to see which apps use cellular data. If you don’t want an app to use your data, you can turn it off for that app.
When mobile data is turned off, apps will only use Wi-Fi for data.
To help you know how much you might need, we’ve included all the common data-consuming activities, with information on how many megabytes they actually use.
1 hour of Internet surfing 15MB
1 social media post with photo 350KB
1 minute of video streaming (standard) 2MB (120MB/hour)
1 minute of video streaming (HD) 5.1MB (306MB/hour)
1 minute of music streaming 500KB (30MB/hour)
1 email (without attachment) 20KB
1 email (with standard attachment) 300KB
1 downloaded application/game/song 4MB
Notice: You can find several data calculators on the web. Depending on the data you have entered: the calculator will show approximate cellular data costs and values depending on the applications you plan to use and how often you use them during your trip.
Yes, of course. When you have an active data plan, the app will display a top-up button on the main screen, tap it and you can proceed to purchase additional data. Once the purchase is complete, the data will be added to your current data and the remaining days of usage will also be updated.
Yesim users can only have a single referral code and can share it with other users. The amount of the referral code is equal to 3 EUR. You will get a discount of 3 EUR after someone who has received your referral code makes a purchase (with your referral code). Both you and your referral will receive a discount.
Only once a new Yesim user can use a received referral code and only for the first purchase.
Note: This must be the first purchase using Yesim.
You can use any credit or debit card from the following franchise: Visa, Mastercard. You can also pay with AliPay, Bitcoins. The cost of a data plan depends on your national currency. The plans are priced in Euro.
The most important thing before buying a plan is to check if your device is compatible with eSIM technology and you can use our service.
Once you buy a data plan, there are a few things to keep in mind.
iPhone Settings – Mobile Data/Cellular – set Mobile Data to Secondary/Yes.
iPhone Settings – Mobile Data/Cellular and make sure data roaming is turned on.
iPhone Settings – Mobile Data/Cellular – Secondary/Yes – and make sure Network Selection is automatic.

eSIM Cards
Which Motorola phones are eSIM compatible?
Motorola has a great range of eSIM-compatible phones, providing a more convenient and flexible alternative to traditional SIM cards. Models in the Razr, Edge, and G series are among the…
eSIM Cards
Google Pixel phones eSIM compatibility: All you need to know
Many Google Pixel phones are eSIM-compatible, which means you can stay connected without relying on a physical SIM card. Generally, you can use models after the Google Pixel 5 with…
eSIM Cards
Which iPhones and iOS devices support eSIM in 2024?
In 2024, iPhone eSIM support has become a standard feature across many of Apple’s models, offering flexibility for users to manage their network options seamlessly. In fact, iPhone XS, iPhone…
eSIM Cards
Samsung eSIM phones – compatible phones and how to activate
A Samsung eSIM works just like any other embedded SIM, which means you can also choose from the most popular providers as long as your Samsung phone is eSIM compatible.…