
eSIM Cards
How to get Ubigi refund?
Ubigi offers eSIM refunds for several reasons, but getting one isn’t always straightforward. After all, many companies aren’t upfront about their refund process. This guide will take you through the…
Advertising Disclosure
Roami was founded to serve as a trusted resource for travelers in need of reliable internet solutions abroad. Our team, comprising avid travelers, provides comprehensive reviews and guidance on data SIM cards, eSIMs, pocket WiFi devices, and free WiFi apps, drawing from firsthand usage during our travels.
We are committed to offering unbiased and thorough recommendations. To support our website, we earn affiliate commissions from links to products on our site. While our reviews are independent and based on our own experiences and detailed product testing, these commissions allow us to cover costs and continue bringing valuable advice to travelers worldwide.
Our reviews and articles are updated regularly to ensure relevance and accuracy. Please note that we may not review every product in the market, but we strive to cover as many as possible to maintain a wide-ranging resource for our readers. Join us at Roami to stay connected wherever your travels may take you.
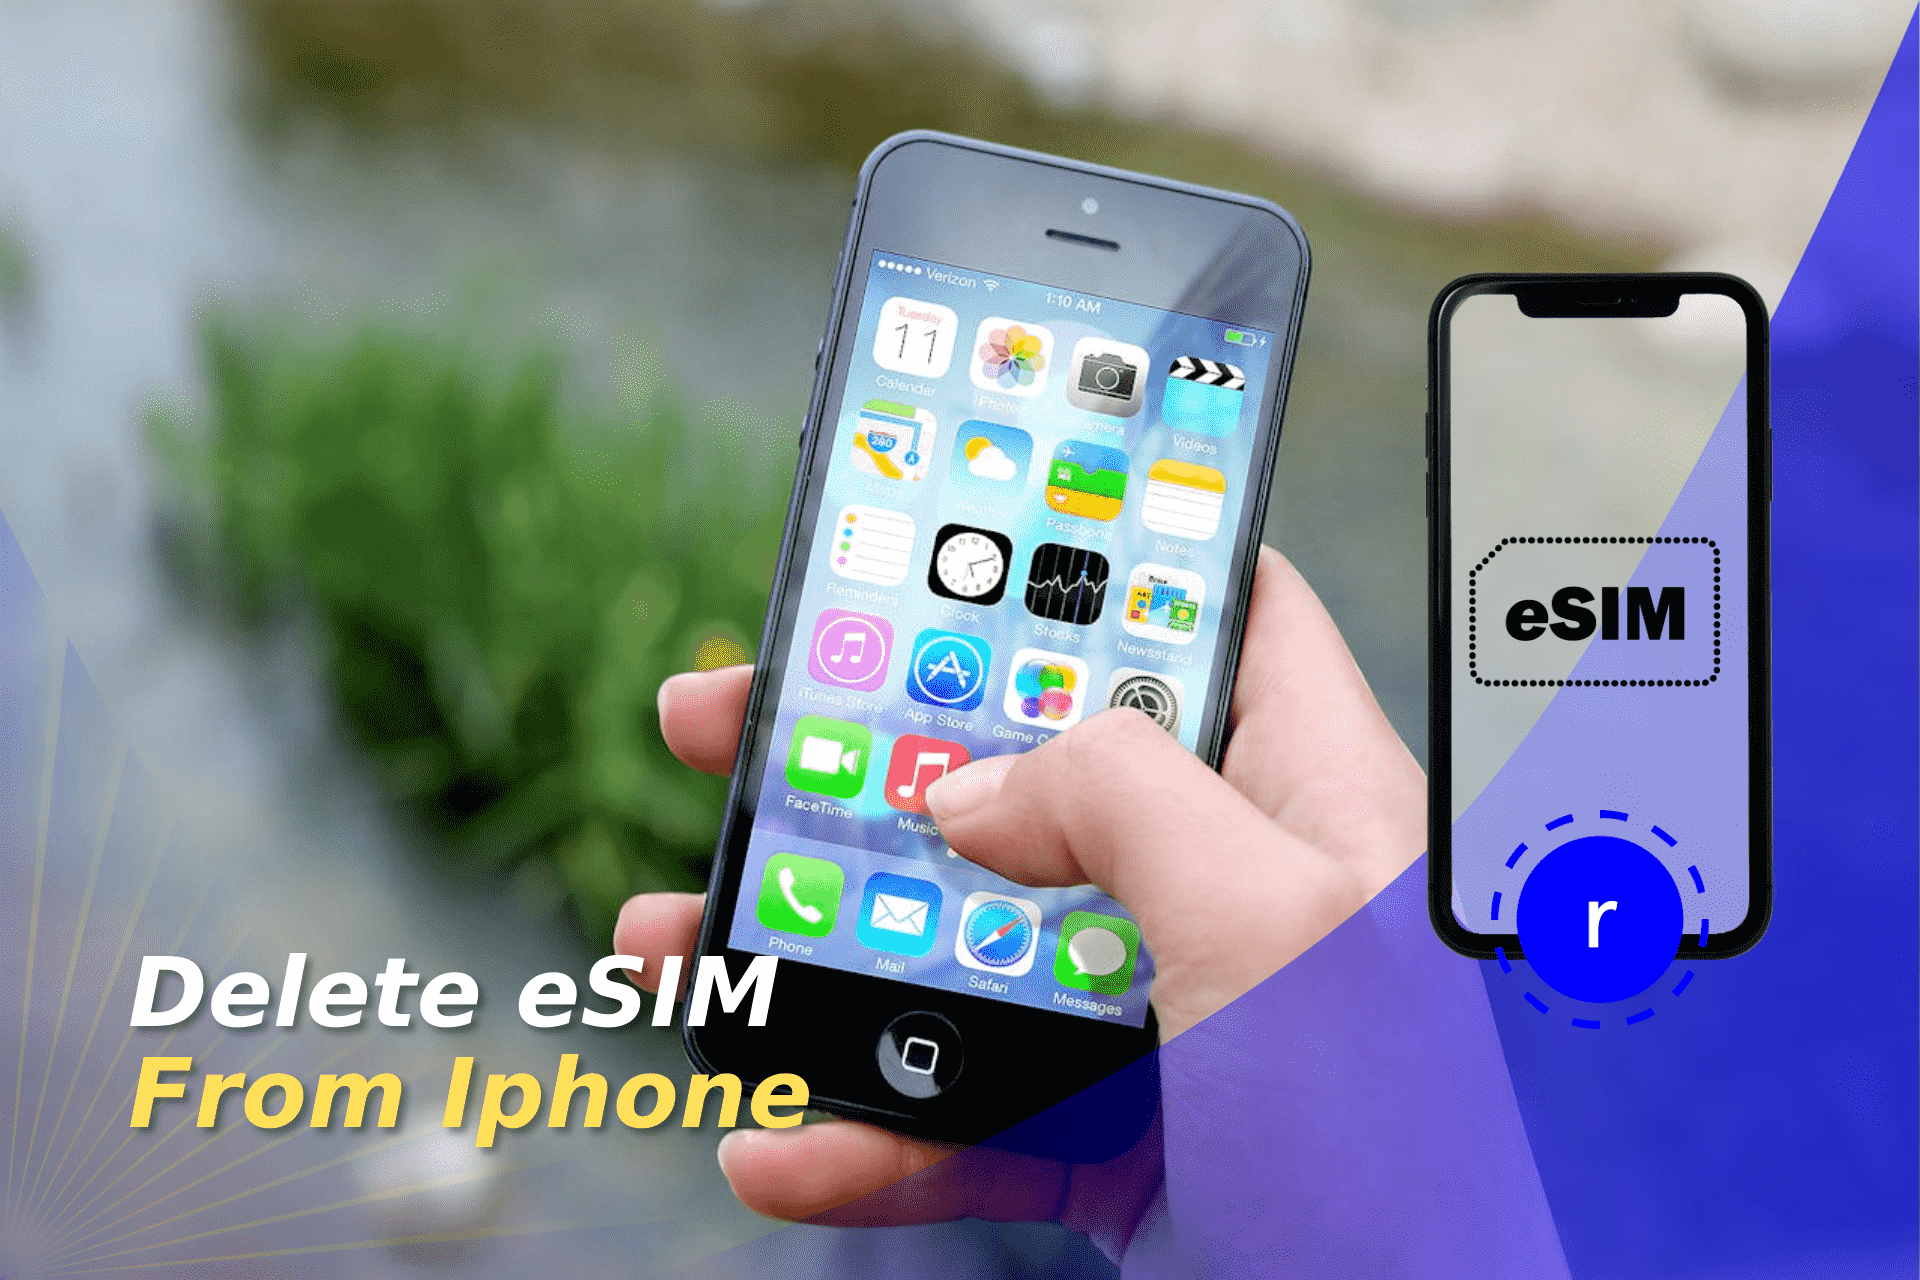
If you need to delete an eSIM from your iPhone, follow this straightforward guide. These easy steps will help you remove it from your device without any hassle.
Removing an eSIM from your iPhone is a simple process. It’s crucial to understand how to do this in different situations:
In this guide, we’ll walk you through the exact steps to delete an eSIM from your iPhone.
Table of Contents
There are, in fact, several reasons why you might want or need to delete an eSIM from your iPhone or other Apple device.
Deleting an eSIM from your iPhone is simple and can be done in a few short steps. It shouldn’t take more than a minute or two.
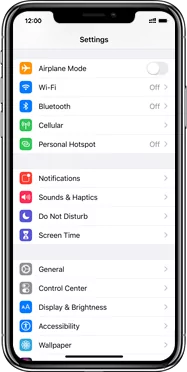
1. Open Settings
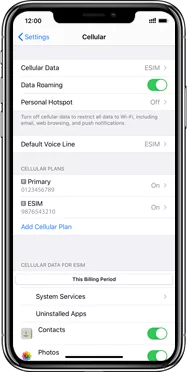
2. Navigate to Cellular:
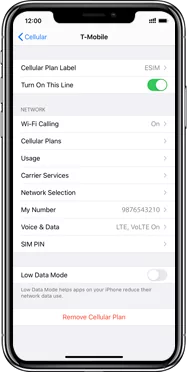
3. Select the eSIM You Want to Delete:
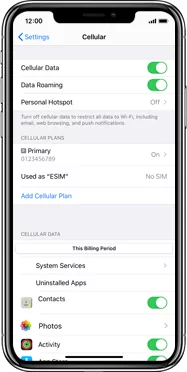
4. Delete the eSIM:
5. Confirmation:
You can have an eSIM on other Apple devices such as an iPad or an Apple Watch. The process to remove eSIMs from these devices is similar. Here’s what to do:
Deleting an eSIM from your Apple Watch is also a straightforward process:
If you’re preparing to sell your iPhone or transfer your eSIM, you should take care of your cellular and personal data. This is crucial so you control who is in charge of your data; you don’t want to risk it falling into the wrong hands.
Follow these steps to ensure safety:
The answer here is it depends on your carrier. Some eSIMs can be reinstalled after being deleted. You’ll need to contact your carrier to get the necessary activation details or a new QR code. However, we recommend you don’t remove any eSIM that you still intend to use. That’s because once an eSIM is removed from your device, you may encounter an error when trying to download it again.
Yes, you can transfer your eSIM to another device, but it often requires the eSIM to be removed from the original device first. The process may vary depending on your carrier. Check out our guide on how to transfer an eSIM to another iPhone. You can also transfer eSIMs to other devices, such as other eSIM-compatible phones from other manufacturers.
Yes, after deleting your eSIM, you can set up a different eSIM on your iPhone, provided you have the necessary details or QR code from your carrier. You can check out our comprehensive guide on how to activate an eSIM for more information.
When you delete your eSIM, the plan associated with it is removed from your iPhone. This means that you will no longer have access to that number or cellular service on the device. If you need to use the same number again, you will have to contact your carrier to reactivate the eSIM or obtain a new one.
No, deleting your eSIM will not impact any physical SIM card you have installed in your iPhone. The physical SIM and eSIM operate independently, so you can continue using your physical SIM without any issues.
No, deleting an eSIM from your iPhone only removes the cellular plan from your device, but it does not cancel the service with your carrier. You will still need to contact your carrier to officially cancel the plan and avoid any future charges.

eSIM Cards
How to get Ubigi refund?
Ubigi offers eSIM refunds for several reasons, but getting one isn’t always straightforward. After all, many companies aren’t upfront about their refund process. This guide will take you through the…
eSIM Cards
How to refund your Saily eSIM
If you’re looking to get a Saily refund, this guide will walk you through the policy and the process to request one. Whether you’re having technical issues or are simply…
eSIM Cards
How to refund your Nomad eSIM
Navigating a Nomad eSIM refund can feel daunting, especially if you’re left without a connection, but it’s actually a fairly simple process. This guide breaks down everything you need to…
eSIM Cards
How to refund Yesim
You can get a Yesim refund as long as you meet certain eligibility criteria. Whether due to technical issues or unmet expectations, you might be tempted to try to get…