In case you intend to travel any time soon, and you want to stay connected during your trip, you need to have different ideas to make it possible. One of those ideas you can have is to use an eSIM in your Google Pixel device!
So, if you have one of these devices and want to use an International eSIM when traveling, here you will learn everything related to it. That way, you will stay connected with whoever you want, whenever you want, and easily!
Contents
How does eSIM work on a Pixel Device?
Wondering what an eSIM is? In case you haven’t heard about this service, there’s no need to worry about that. It’s completely normal for travelers to have doubts, and we are here to explain all that and how it works too.
eSIMs are basically the same thing as a SIM cards. Yes, there are some main differences between them both, especially the fact that the eSIM is completely digital, and it is activated through a QR code.
Other than that, we can tell eSIMs have a pretty similar service to SIM cards. They offer cellular data, which happens to be the most important thing for users. It is pretty easy to understand what it is and how it works!
Which Google Pixel are compatible with eSIM?
When we talk about Google Pixel devices, we have to remember that there are different options out there available for people to use. But, the first thing to know here is the fact that when using an eSIM, people must have access to a last-gen device, so probably not every single Google device will properly work.
Other than that, here’s the list of devices that support an eSIM:
- Google Pixel 5
- Google Pixel 4
- Google Pixel 4a
- Google Pixel 3
- Google Pixel 3a
- Google Pixel 2 (Only with Google Fi service)
How to activate an eSIM on a Google Pixel device?
When activating an eSIM, the steps to follow are pretty easy. Here’s the step-by-step guide you need to follow.
1. Go to the “Settings” menu on your Google Pixel device.
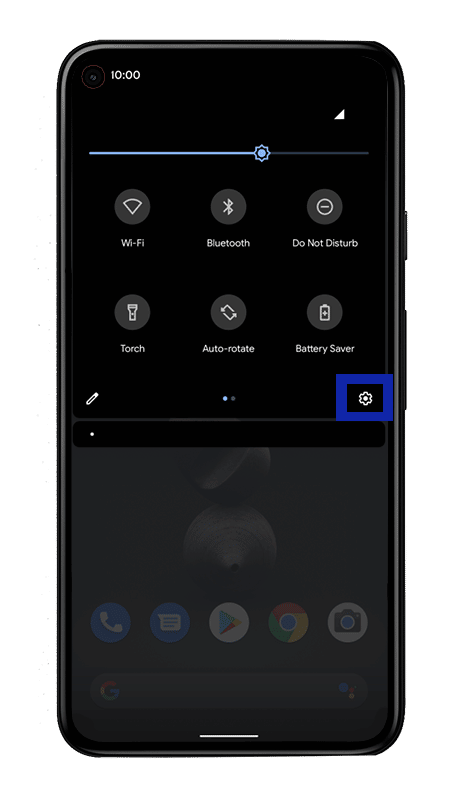
2. Once there, find the “Network & Internet” menu.
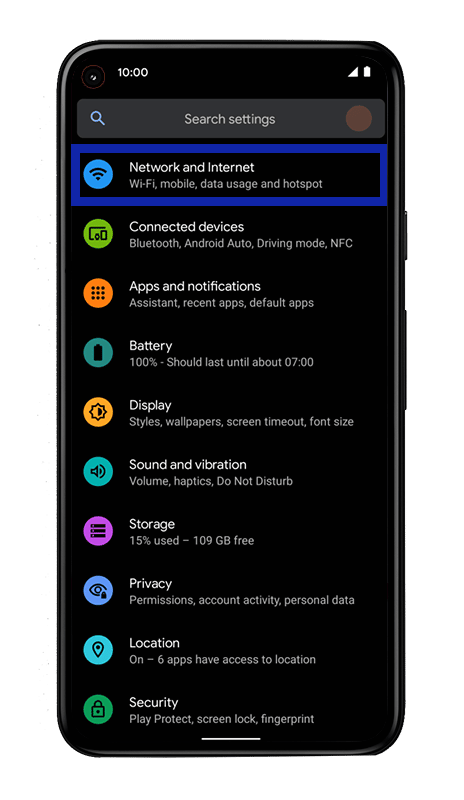
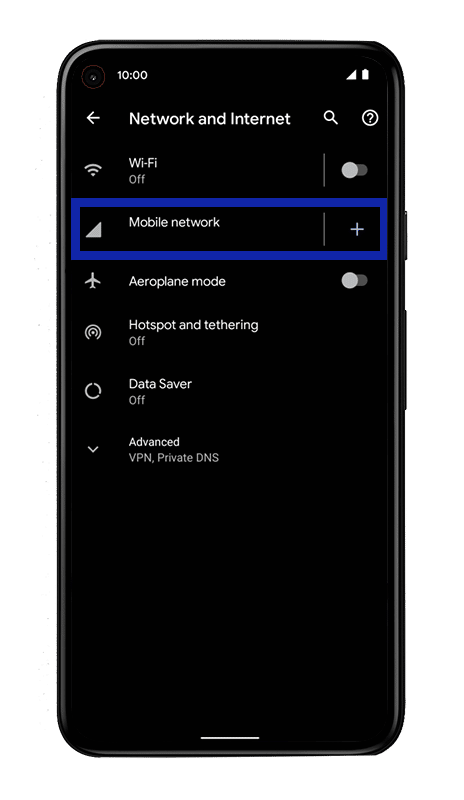
3. Find the “Mobile Network” option and click on it.
4. Press on the “+” button to add a new eSIM.
5. Click on the “Download a SIM instead?” option to continue the process.
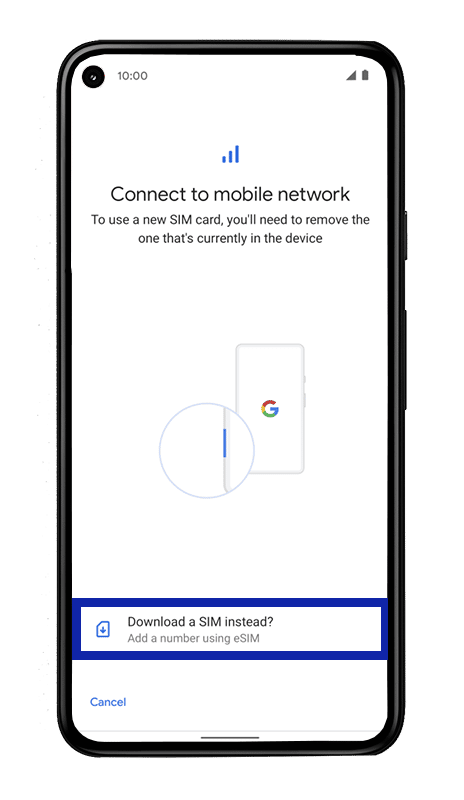
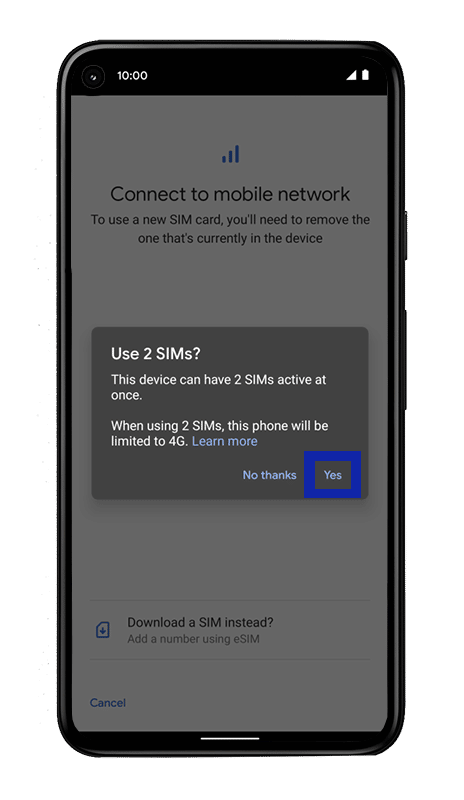
6. Once the message “Use 2 SIMs?” show up press the yes option.
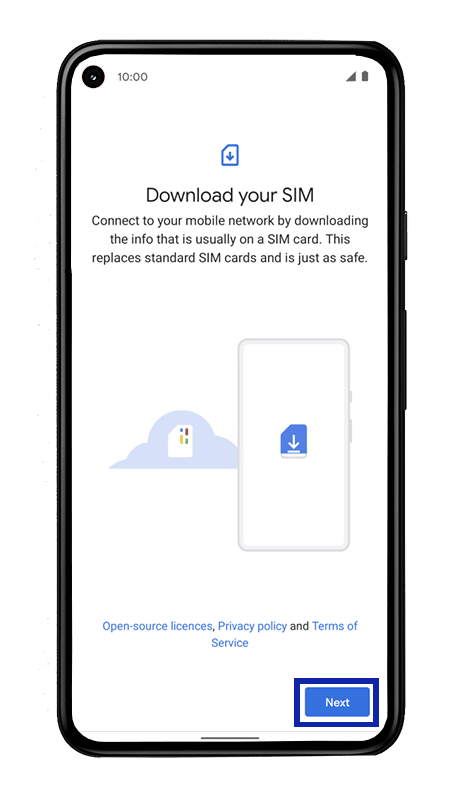
7. Tap Next to download the new eSIM
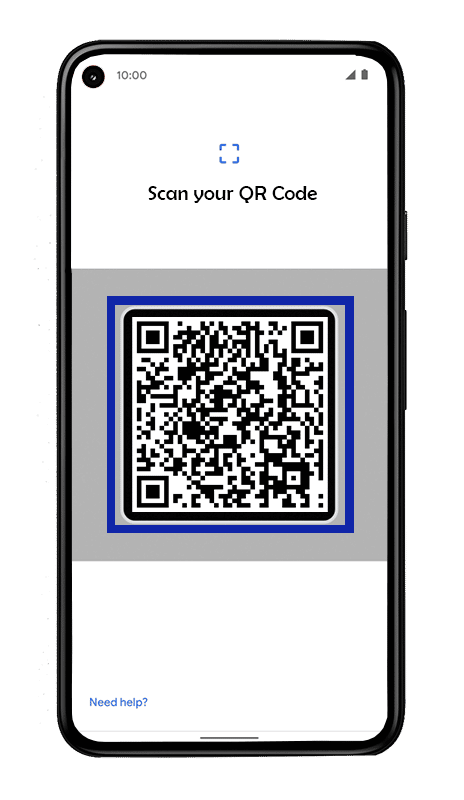
8. Next, scan the QR code provided by the company where you purchased your eSIM.
9. The eSIM will be now activated on your Google Pixel device.
Two things you need to remember to do after the activation process is done are: to have a prior internet connection to complete the process and activate the roaming service when traveling. These options are a must and people can’t forget it, when using an eSIM.
Other than what we just said, it is fair to remember that people can only use one eSIM simultaneously on their devices. People can still add more eSIMs to their device, but then they will need to swap from one to the other to actually use the eSIM you prefer.
Another thing we have to mention is the fact people can still use their SIM card when using an eSIM card. This means that they can also switch from their eSIM to their SIM card in a matter of seconds if needed, but the roaming price is a bit higher.
This information can be beneficial in the case that you have no cellular data left on your device, and you need to use a different alternative.
After all this information, you can now start to use your eSIM and enjoy your trip!
Can you have multiple eSIM on a Google Pixel device?
Yes! As for now, people can store more than one eSIM on their devices. As we mentioned before, people can only use one eSIM at a time, but that doesn’t mean they can’t change from the one they prefer to use in a few seconds.
To achieve this, we encourage people to change the name of their eSIMs, so they can tell which one they are using. And, the best thing is, the SIM card on your cellphone won’t stop working at any time!
Up to this point, we can only tell you that you are now ready to grab your Google Pixel device and get an eSIM to use while traveling. As long as you use the guide we just left for you, you will be able to complete the process in a few minutes!
